Removing a sliding screen door can seem like a frustrating task, especially if it’s sticking, damaged, or just plain old. But, whether the door has gotten off track or it’s damaged, sliding screen door replacement doesn’t have to be complicated. With the right tools and a bit of guidance, you can learn how to remove a sliding screen door like a pro.
When to Replace a Sliding Screen Door
There are several signs that it’s time to replace a screen door. First, if the screen itself is torn, frayed, or full of holes, it might not be providing the protection it should. A damaged screen lets insects in and can affect the overall look of your home.
Another sign is if the door is hard to open and close. Over time, the rollers on the door can wear down, making it more difficult to slide smoothly. This can cause the door to stick or come off its track, leading to frustration every time you try to use it.
Finally, visible damage to the frame or handle is another clear sign it’s time for a replacement. A bent or cracked frame won’t function properly and could pose a safety risk, while broken handles make the door hard to open or close. All of these things indicate that it’s time to learn how to remove a sliding screen door.
Tools and Materials Needed for Door Screen Replacement
To remove and replace a screen door, you’ll need a few simple tools and materials. Here's a quick list of what to have on hand:
- Flathead screwdriver: A screwdriver is key to how to remove a sliding screen door from the track and adjust the rollers.
- Phillips head screwdriver: For removing any screws holding the door in place.
- Putty knife: This can be used to gently pry the door off the track if it's stuck.
- Replacement screen door: If you’re here to learn how to rescreen a sliding door, make sure you have the replacement ready to go.
- Replacement rollers: If your door is sticking, new rollers may help it glide smoothly again.
- Vacuum or brush: To clean out the tracks before reinstallation.
Having these tools ready ensures that you can remove the screen door smoothly and get started on any necessary repairs or replacements.
How to Remove a Sliding Screen Door
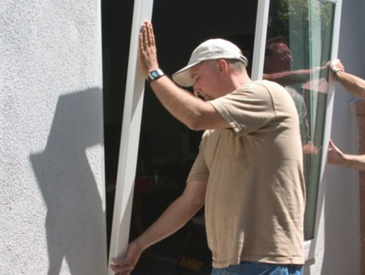
In order to remove the screen door, it must come off of the rollers. Watch the video below and read the steps to easily remove your patio door screen and make any necessary adjustments. It should take about 10 minutes to complete the process.
Step 1: You’ll see inner screws at the bottom of either side of the screen. Using a Phillips screwdriver, turn the screw counter clockwise to raise the screen up until you see the head of the screw. Repeat on the other side.
Step 2: Raise the screen slightly to find the wheels on either side. You’ll want to place the putty knife under the wheel and then push in and lift.
Step 3: Once the wheel is up, you will be able to slide the screen towards you. Do both sides and the screen is removed.
How to Replace a Screen Door
Now that you know how to remove a screen door from the track, it’s time to figure out how to put it back. When you’re ready to reinstall the screen, follow these steps:
Step 1: Line up the top two wheels back inside the track and push up the screen as high as it will go. Hold the screen out slightly and push the wheel up with the putty knife and slide the screen back into the track. Do the same on the other side.
Step 2: It’s important to adjust the rollers before using the screen again. Take your Phillips screwdriver, turn the screws clockwise until you see the screen lowering back into the track. Repeat on the other side.
How to Install a Patio Door Latch
Sometimes, you don’t need a full patio screen door replacement. You might be able to get away with replacing some hardware, like the latch.
Step 1: On the screen door handle, you’ll find a small plastic bag that contains the latch. Unscrew to remove it and adjust the door latch to its lowest position.
Step 2: In order to be sure you are lining up the latch properly with the screen door, put a removable mark (painters tape or pencil) on the door frame that is level to the bottom of the handle tab. Note: This is the lowest place where the point of the keeper should reside for the tab to engage.
Step 3: Use your Philips head screwdriver and insert one screw into the bottom hole. The screws should be about ¼” apart.
Step 4: Note that whenever the screen is re-installed, always check that the keeper is still in the optimum location. You can adjust it by loosening the first screw. Then the keeper can be moved where you need it before you retighten.
Step 5: Check to make sure the screen operates smoothly.
Step 6: Install the second screw into the top hole.
Get Expert Help with Sliding Doors
If you’re wondering how to remove a sliding screen door, you might actually have larger problems with the entire door system. If your screen is worn out, it could be time to replace the entire sliding door, especially if the frame or glass shows signs of damage.
MILGARD offers both sliding doors and complementary screen doors to give your home a fresh look and better functionality. If you’re unsure whether it’s time for a full door replacement, talk to a Milgard expert today. Our Certified Dealers will go way beyond how to remove a screen door, helping you choose the right door for your home and guiding you through the process.


